Time Lapse Photography: Complete Guide
Some time ago a couple of readers asked me for a tutorial on time lapse photography. Having only read about it, not having practiced it, I was a little reluctant to write about it.
But now I’ve given in, I’ve done my research and here’s an in- depth guide to learning how to make time lapse movies.
What is time lapse photography?
If you do not know what it is, time lapse photography (also called simply time lapse) is a technique thanks to which videos are made composed of frames taken at a much lower frequency Interior Design Time Lapse than the reproduction rate (for technical details, I recommend Wikipedia ).
Some Videos are created by taking several shots of the same scene at regular intervals and then editing them into a video, one shot per frame.
The time interval between shot and shot is always such that the frame rate is lower than the video playback rate (24 frames per second). Hence the characteristic “accelerated” effect is obtained in which everything moves very quickly.
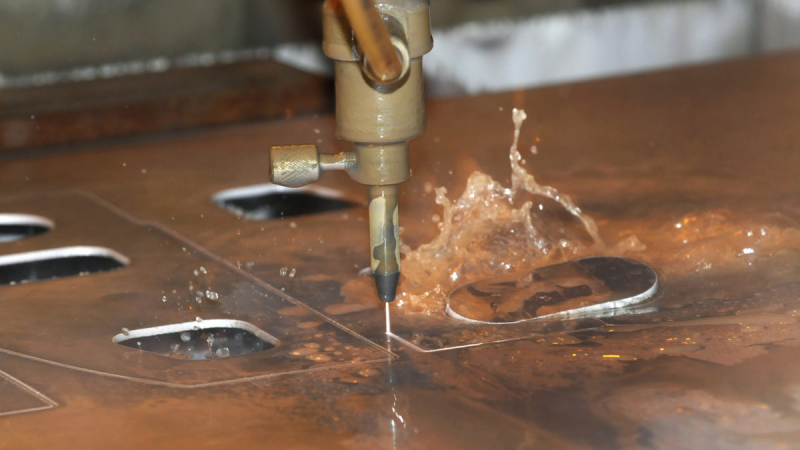
With the right choice of subjects and shots, time lapse guarantees results of sure effect, often very spectacular, but also of documentary effectiveness (such as the time lapse of blooming flowers or the construction of imposing buildings).
Fortunately, from a technical point of view, you don’t need to have the most advanced tools and knowledge to make a time lapse video. Read on to know everything you need:
necessary tools,
implementation procedure,
practical advice,
examples of inspiration,
Resources for insights.
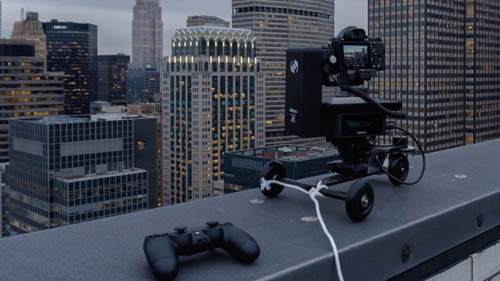
The tools for time lapse
First of all, you obviously need a camera. With an SLR you are on the safe side, while all other digital cameras may not have the necessary features or accessories.
If you really can’t use a reflex camera, at least try to get a compact with manual controls (which I talked about, for example, in the article on compacts to learn how to photograph).
Once you get the camera, you need to make sure it can shoot at regular intervals. Some cameras (not many) have this feature built in; try looking if yours has it. Otherwise you have to use an intervalometer, or a remote control in which you can program the shutter frequency.
An intervalometer, once programmed, connected to the camera and started, will take care of triggering the camera according to your settings and you can let it work and return to recover everything at the end of the recording.
For reflex cameras it is easy to find many models of
intervalometer. Nikon and Canon have their own programmable remote shutter controls, but they are quite expensive. I’m the Nikon MC-36 and the Canon TC-80 N3 . As always, there are also economic (and sometimes universal) alternatives.
If, on the other hand, you are trying to make do with a compact digital camera or a bridge that does not offer the possibility to program the shots, you can try the PClix remote controls, which are compatible with very few non-reflex models. Or, if you have a Canon, there is a modified firmware that includes this feature, it’s called CHDK.
An additional accessory that you may need (only if you use a reflex camera) is an ND filter . The main function of this type of filter is to reduce the amount of light entering the camera, thus allowing you to slow down the exposure time. As we will see in a bit, this often comes in handy for those who want to make time lapse.
The procedure for making a time lapse
Now that you have the tools you need, here is the procedure for making a good time lapse, roughly speaking:
look for the subject,
set up the camera
3. Exposure,
4. White balance,
5. Focus,
6. Calculate number and frequency of shots,
7. set the intervalometer,
8. Start recording.
Now let’s see in detail the first three steps, which hide some pitfalls.
1. Look for the subject
First of all, identify a good subject, which lends itself to photographing its evolution over time and then reproducing it accelerated. Some subjects that can be seen in time lapse movies are:
rotting fruit,
melting ice,
blooming flowers,
growing grass,
busy streets (both in the city and outside),
sunsets and sunrises,
construction sites,
foods while cooking,
Clouds moving in the sky.
Once you have identified your subject, find a position that allows you to shoot effectively. When the subject is large, such as a city street, finding the right location will be more challenging.
2. Set up the camera
When the time comes to shoot, place the camera in the spot and make sure it is secure by using a good tripod or some other support to stabilize it. Fix it on the tripod and compose the shot. If you have a very long session planned, in which an object, such as the sun, will move through the frame, be careful to compose it to include its entire path.
When setting up the camera, the general criterion of totally avoiding automatisms applies. This is because, if some automatism
is activated, the camera could change settings between shot and shot, thus obtaining different frames, for example for exposure or white balance. This would result in a flickering video, which would take hours of work to correct and smooth hundreds of frames.
First of all set the white balance. Use a predefined or customized one, helping yourself with a gray card, if necessary (to learn more, you can read the article on white balance).
Then comes the exposure. The best choice is to use the manual mode.
As for the aperture, the advice is to use a wider one of f / 8 (i.e. with a lower value). This is to reduce the risk of flicker due to the excessive distance the shutter has to travel.
The exposure time should not be too fast. In fact, even shots that freeze motion too much risk causing flicker. Better to have slightly blurry movements, which merge the frames together. So the exposure time shouldn’t be faster than 1 / 100s. To allow slow times an ND filter can be useful.
If you are not yet familiar with the manual mode, you can use a semi-automatic mode to find out the right manual settings. Put the camera in aperture priority; select the aperture that guarantees the depth of field you want and then the ISO. If exposure time is more crucial to you than depth of field, you can use the shutter priority mode.
Then take a test shot. If you like the shot make a note of the settings and copy them in manual mode. Otherwise repeat the procedure until you get a picture that suits you.
Finally, turn on manual focus, so the camera will keep the focus of
the last shot (the test one, which then should be what you want). You have to avoid autofocus because otherwise you risk changes of focus during the sequence of shots, obtaining unpredictable and annoying effects.
A particular consideration concerns the quality of the photos. Often, making a time lapse, you will find yourself taking lots of shots. Shooting at the highest quality would risk filling your memory too soon.
Also, if you shoot in RAW, the camera may not be able to sustain a high frame rate if needed. High-quality photos are also bulky and require a lot of computing power when mounted in a video.
So, unlike usual, in this case it is useful to choose a smaller size for the photos (fewer megapixels) and even use the JPEG format.
On the other hand, keep in mind that the maximum resolution for a video is 1920 x 1080 pixels, while the resolution of a photo at maximum quality is much higher. For example, a 10 megapixel Nikon D3000 shoots at a maximum resolution of 3872 x 2592 pixels.
3. Calculate number and frequency of shots
This step is very important and not trivial. First of all you have to identify the speed of the phenomenon you want to document: building a house is much slower than cooking a cake in the oven.
For faster phenomena more frequent shots will be needed and vice versa. As often happens, finding the right values will also depend on experience: after a few attempts your estimates will become more precise.
You can use this formula to help you, assuming you have decided in advance how long the video will last at the end:
Frames per second X video length = number of shots
Event length: number of shots = interval duration
Otherwise, you can use the time lapse calculator.
Once you have determined the length of the intervals and the number of shots, you can set the intervalometer or camera and put them to work.
Edit the video
Once the shots have been made and possibly retouched, the video editing can be done with many different programs. I will not go into depth on this topic because it deserves an article in itself.
Virtually all video editing programs offer the ability to create a movie from a series of images. Some programs dedicated to managing and processing photos also help in this.
Among the free ones, you will certainly find Movie Maker on Windows and iMovie on Mac. In addition, Picasa also allows you to create videos from single images.
Otherwise you can try PhotoLapse (Software) and JPG Video (Software).
Don’t forget that proper music is needed to get a good result.